Getting Started
Creating an Itinerary Using the Itinerary Builder [*UPDATED 6-Jul-2018*]
Itineraries are a powerful and interactive way to help travellers visualize the tour as a whole. You can pre-build any number of itineraries of the tours that you offer so that you are ready to attach them to any tour offers you make. Your itineraries will also be displayed to travellers looking for tours in those regions.
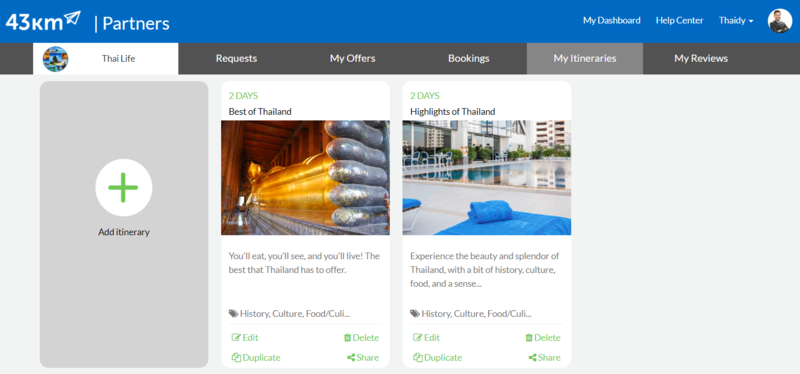
My Itineraries
You access your Itineraries by going to the “My Itineraries” tabs. Here you’ll see any itineraries you built in the past, and you'll have the options to Edit, Duplicate, or Delete an itinerary.
To edit, click on the itinerary you want to edit, or click the Edit button.
Clicking the Duplicate button creates an exact copy of the itinerary so that you can simply make edits or add/remove days without building every itinerary from scratch.
The Share button gives you a short unique URL so that you can share the itinerary with clients or post them anywhere on the web.
To build a new itinerary, click on “Add itinerary”.
Itinerary Builder
The Itinerary Builder is the page you will see when you either Add a new itinerary or Edit an existing one. Here you can enter the Title, specify the Countries and Regions that the tour visits, and Description, as well as indicate the type of tour this is by selecting the tags below. Please note, you should only use content that you own the copyright and have the right to use.
Continuing down, you'll build the individual days and activities that are part of your tour.
Each "Day" will have a number of "Activities". An Activity consists of the time, name of the Activity, Description, Pictures, and a Map location.
The time and name of the activity are required, but the description, pictures, and map location are optional.
To add a day, click the + sign that appears after the last day. To remove a day, click the trash can to delete that day and all its activities.
On each activity, you'll find buttons to Remove or Edit an activity, and at the bottom of the page, a button to add a new activity to the current day. Be sure to save an activity before editing others to avoid losing any changes.
Pictures
To add images, click the 'Attach Image by URL' button or 'Upload Image' button and attach the picture you want to use. You can add more than one picture for each activity by pressing the the button again and attaching additional images. To accommodate for mobile users, all images should be no larger than 800x600 for horizontal and 400x600 for vertical. All pictures used in your itinerary should be images that you own the copyright and have the right to use.

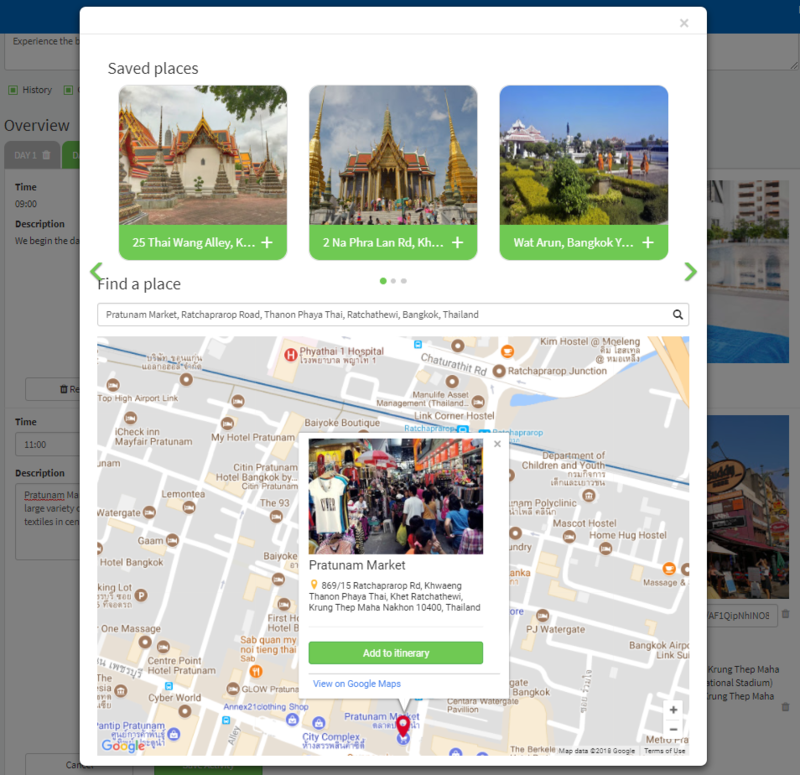
Map Location
To select a map location for this activity, click on the "Attach map location" button to open the Places dialog.
Here you can select from your recent places or look up a new place by typing the name into the search bar. Clicking on "Add to Itinerary" attaches it to the activity and closes the dialog.
When Travellers look at the itinerary, they will be able to see on a map, the locations of all of the activities that they will be participating in.
Finally, be sure to Save the activity and then Save the Itinerary if you made any edits.
That's it! Now when you make an offer to a traveller, you can attach this itinerary to the offer.
Last Updated 06-Jul-2018